
The Effortless Ballet Strength Training Guide: The Ballet Warm Up and Workout Routine Every Mom Needs
If you’ve ever watched a ballet dancer move across a stage and thought, how does


If you’ve ever flipped a store-bought moisturizer jar around and squinted at an ingredient list you can’t pronounce, you already know the feeling that pushed me to start making my own. A few years into this natural living journey, I stopped wanting to guess what was actually going onto my skin and I decided to just make it myself.
So today I’m doing something I don’t do often: revealing my full DIY facial moisturizer recipe, secrets and all. If you’ve been wondering how to make your own facial moisturizer at home, this is everything I wish someone had handed me when I started.
In my early 20’s, I tried so many expensive skincare routine lines and many of them included 5+ products. Nothing worked. Nothing healed my acne and dry skin. So, a friend of mine had suggested that I make my own moisturizer. So, I began the research off google. I typed in, “Best natural ingredients to use for facial moisturizer.” From that point, I started taking notes and coming up with my list of ingredients I felt best to include in my homemade moisturizer.
A homemade facial moisturizer gives you three things a store-bought jar rarely can:
And honestly? There’s something deeply satisfying about knowing exactly what’s in the jar on your bathroom counter.
This recipe leans on a few core natural ingredients, each doing real work for your skin:
Note: I recently reformulated my own moisturizer to swap in shea butter over cocoa butter and add arrowroot powder. It made a noticeable difference in how the finished product feels on the skin, especially for anyone who found richer butters too heavy.
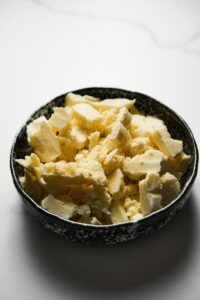
That’s it. No complicated equipment, no hard-to-find ingredients – just a little time and a double boiler.
I get this question a lot, and my honest answer is: it depends on your season of life. Making your own moisturizer is incredibly rewarding, but it does take a little time and a bit of trial and error to land on your perfect ratio.
That’s exactly why I started making a version of this in small batches for the Noble Motherhood Store. So if you love the idea of a natural, simple, ingredient-you-can-pronounce moisturizer but don’t have the time (or the double boiler) to make it yourself, you don’t have to choose between convenience and clean ingredients.
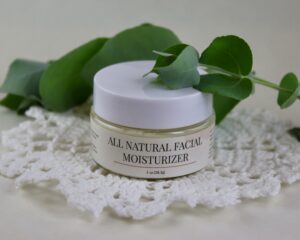
This moisturizer is even better paired with the rest of a natural skincare routine. I always recommend following up with a gentle cleanse with a hydrating toner before locking everything in with moisturizer. If you haven’t already, it’s worth building out that full routine so your skin gets consistent care, not just a one-off treatment.
And if you’re navigating postpartum skin specifically – hormonal changes, dryness, sensitivity – grab my free Natural Motherhood Guide for more simple, natural swaps you can start using today.
Want to hear the full story behind this recipe — including a few secrets I only shared out loud? Listen to the full episode, “DIY: Making Your Own Moisturizer (revealing my secrets!),” on the Noble Motherhood Podcast.
If you’ve ever watched a ballet dancer move across a stage and thought, how does

Nobody warns you about this part: a few weeks after birth, your skin joins the

We spend nine months preparing for birth — the classes, the bag, the birth plan